Aren’t these cupcakes fun?? SInce the weather has gotten a little chilly over here where I live, I decided to add a touch of sunshine by making these cute sunflower cupcakes! They are so much fun and easy to make and it is a great activity for you to do with the kids! To make the process a little father for you, you are more than welcome to make a boxed cupcake recipe instead of making it from scratch. Also, if you want to save even more of your time, you may also use store bought frosting (not icing!!) to pipe the sunflower pedals shown below.
In a small bowl, take out about 1/3 cup of frosting and add in a drop of green food coloring and mix until fully incorprated. Then, in another bowl, take the remaining frosting and color the rest of it bright yellow using the yellow food coloring. Set up two piping bags (or zipblock bags with a corner snipped off) and place the #352 Wilton piping tip in the open corner and fill it with yellow icing (filled only halfway so the bag does not over flow!!).
If you don’t have couplers or a piping tip, this YouTube video shows you how you can pipe leaves without them! I just prefer to use my piping tips because I have them, and they make the process a bit easier.
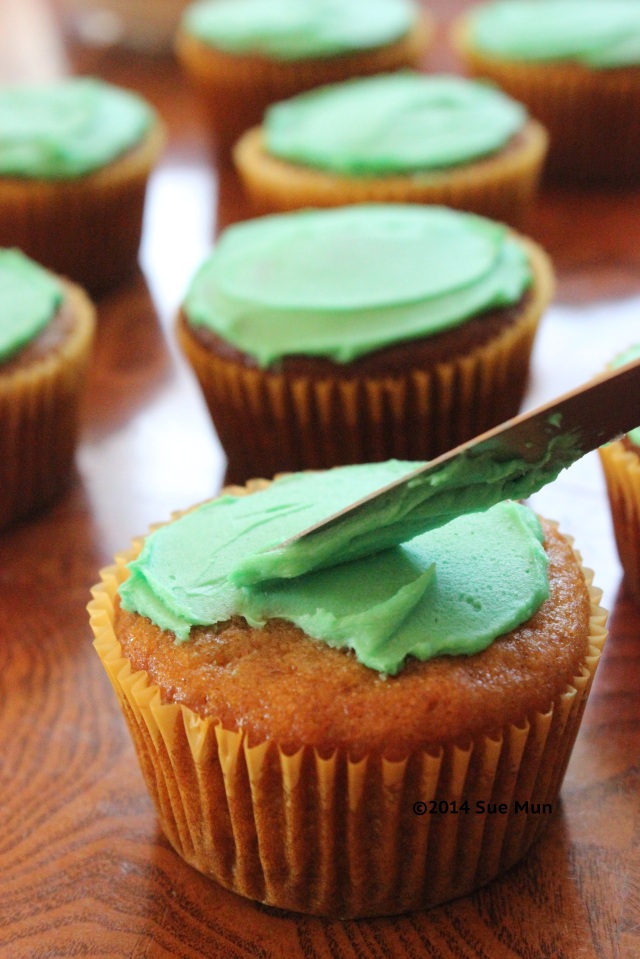
Spread a layer of green icing ontop of each cupcake to make the green “grass”.
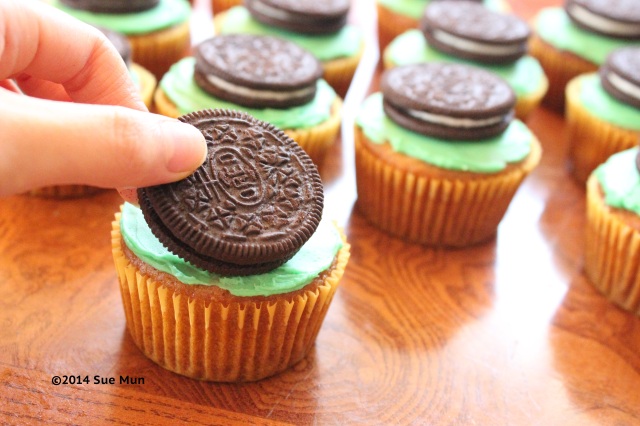
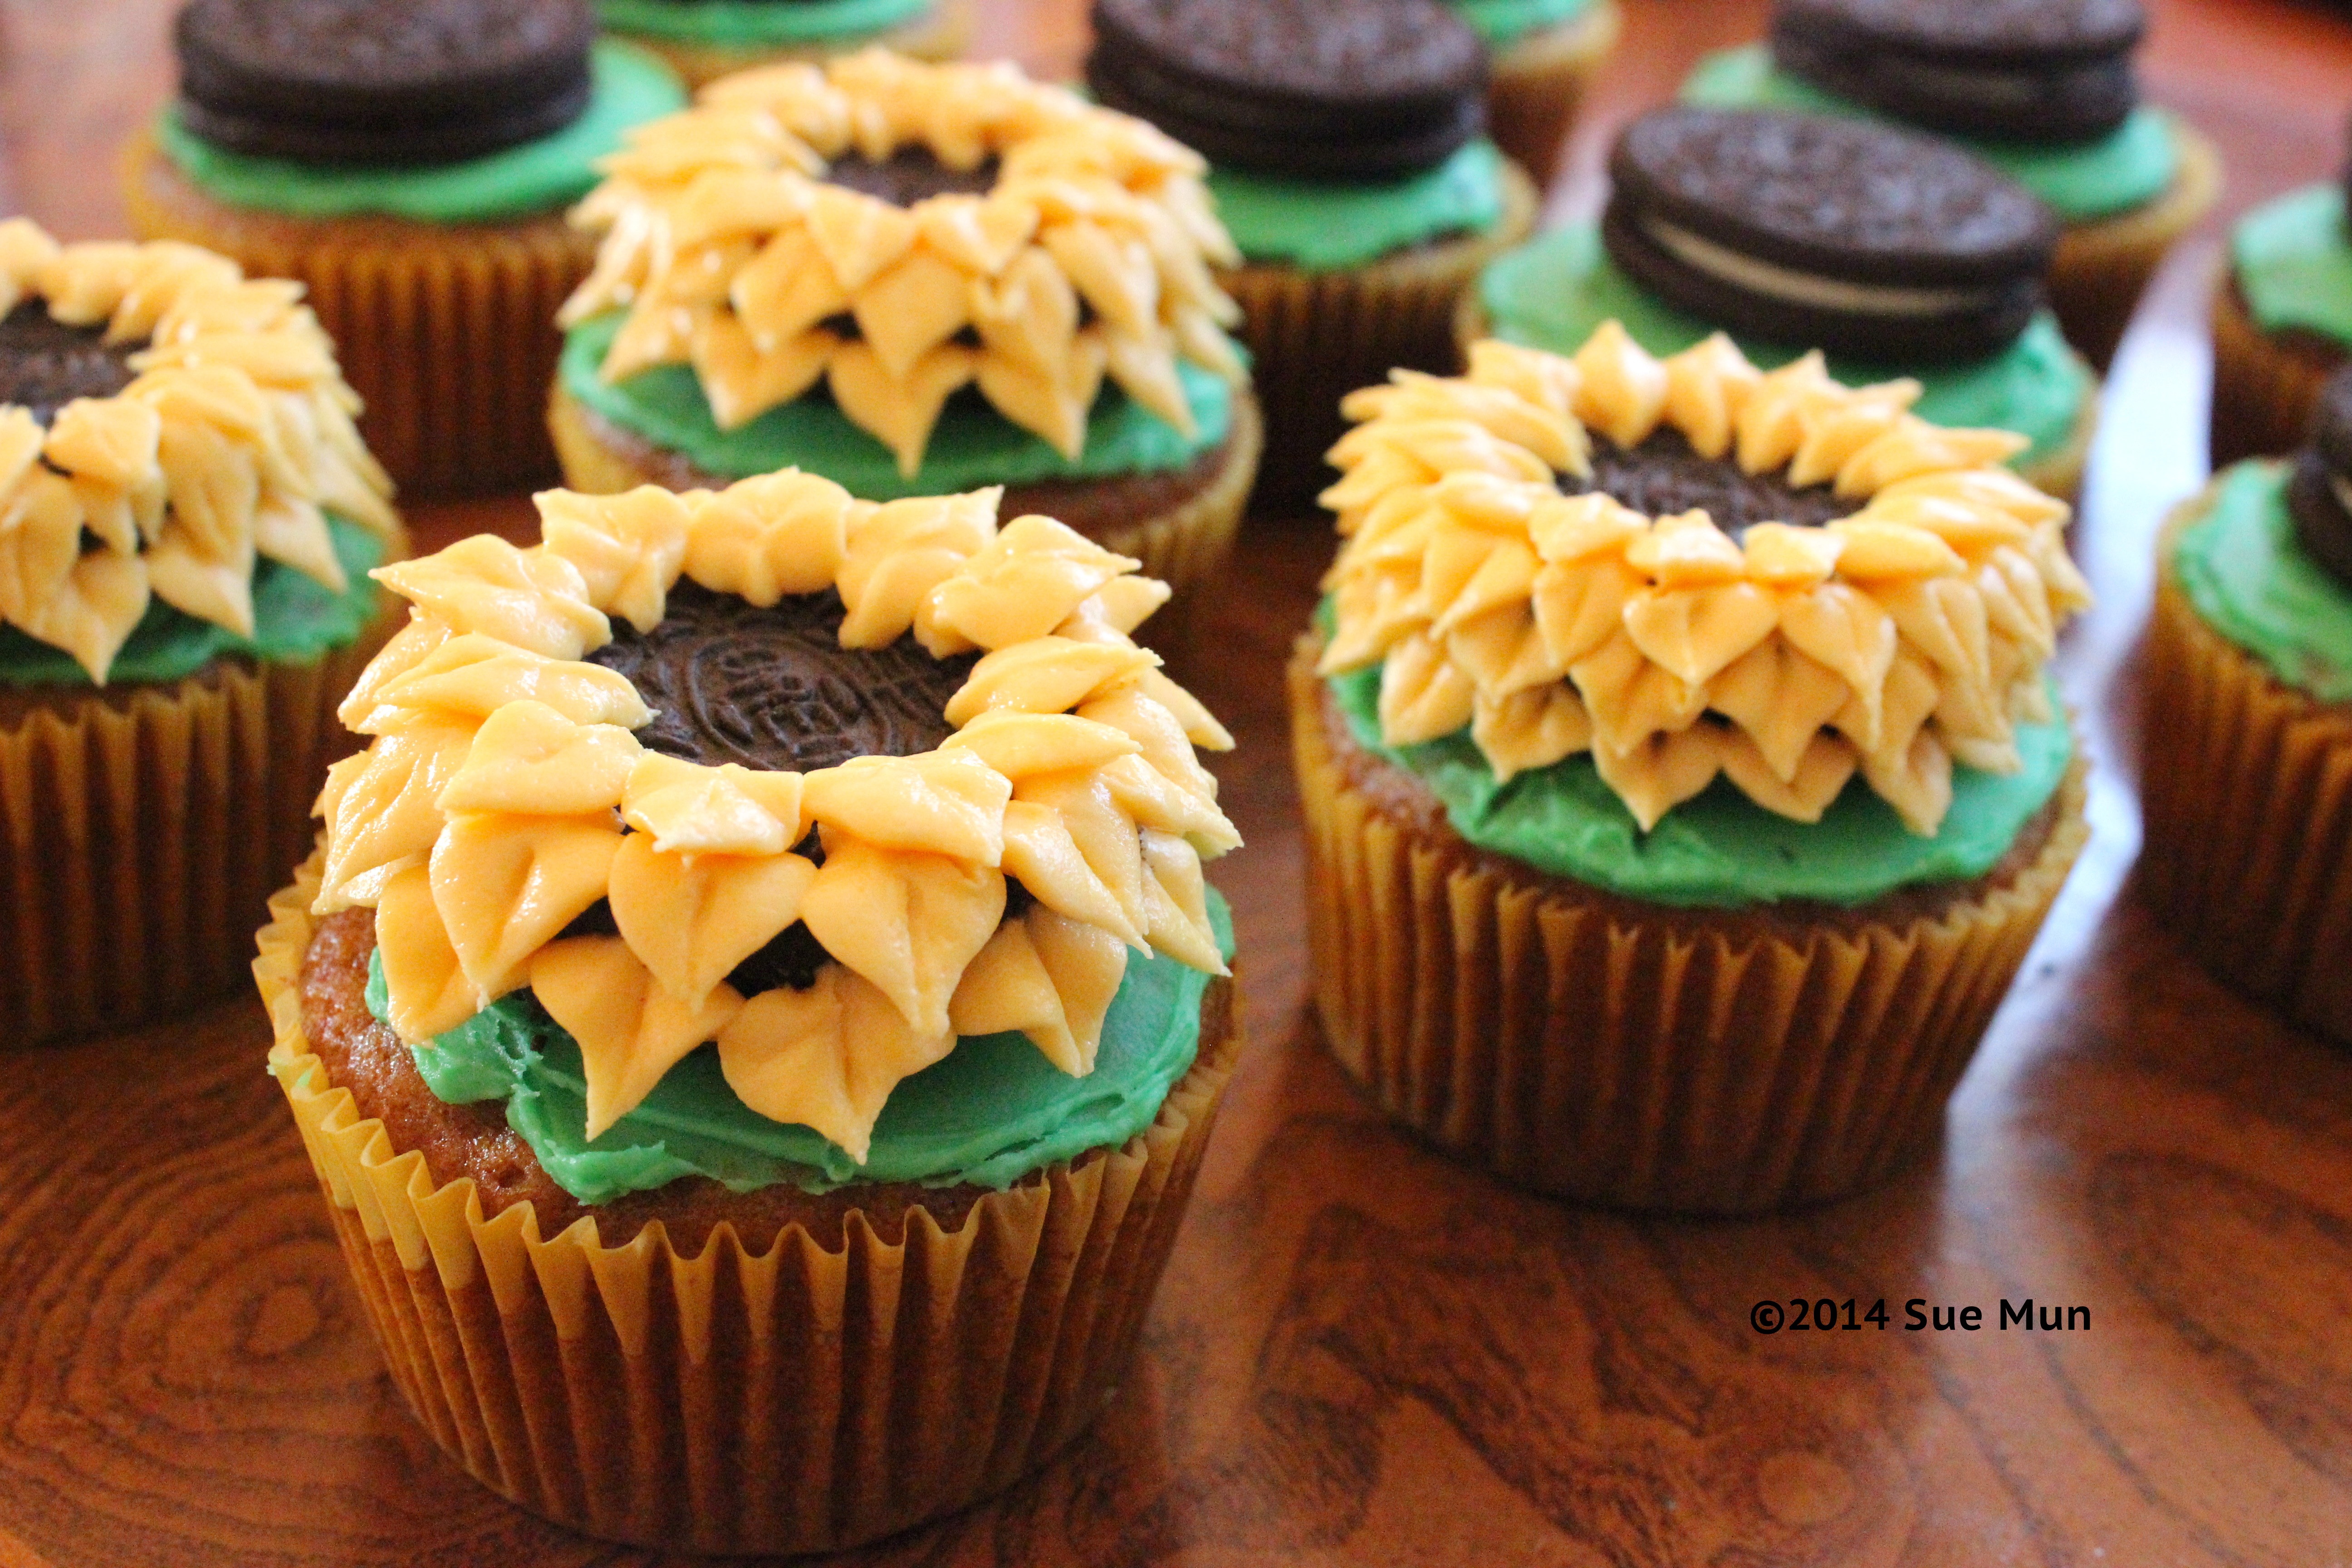
Once you are done spreading the green frosting on all of the cupcakes, place one Oreo cookie ontop of each cupcake for the “sunflower seeds”
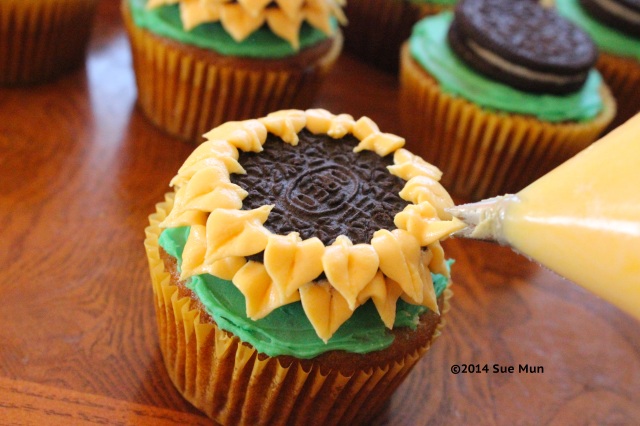
Grab your prepared green frosting bag and hold your piping bag at a 45 degree angle. Aiming towards middle of the Oreo where the Oero filling is, start piping around the Oreo. To do this, you push the frosting out and slowly pull it towards the edge of the cupcake, releasing pressure and lifting up slightly at the end to make it make a point. After that is done, you do the same thing ontop of the first flower pedel layer and continue until you have the desired amount of flower pedal layers on your cupcake.

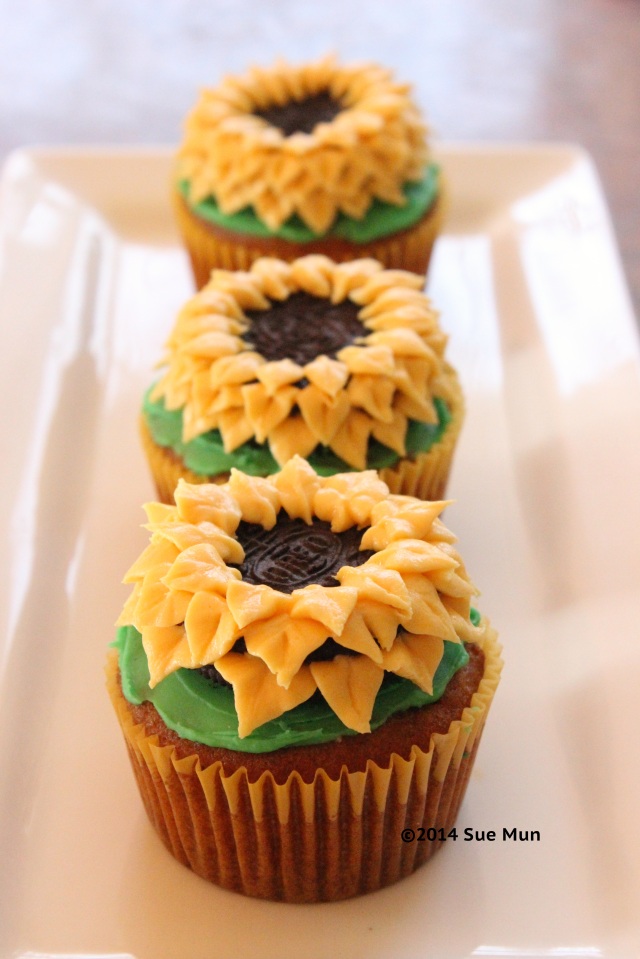
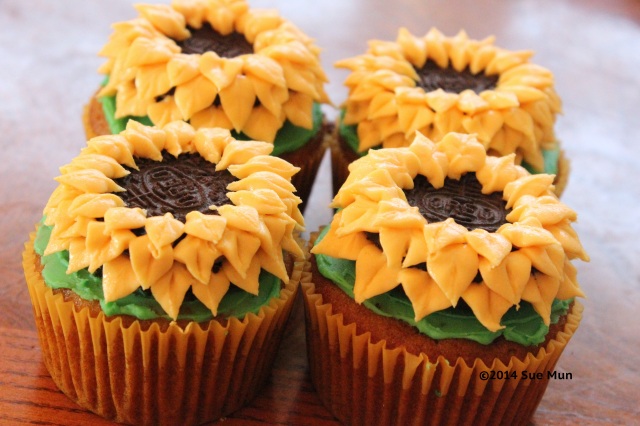
Now you are ready to WOW the crowd!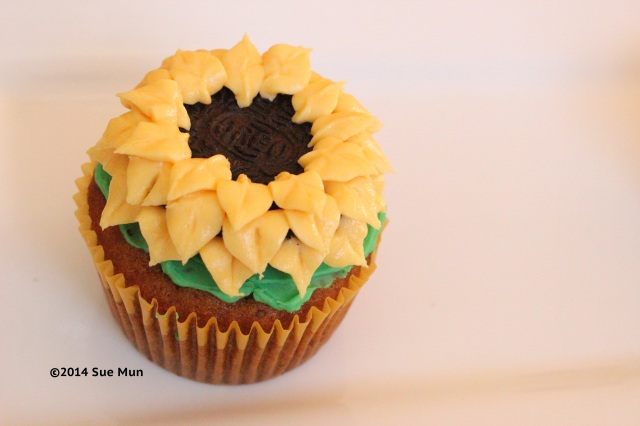
Sunflower Cupcakes
Ingredients
- Cupcakes – baked and cooled to room temperature
- Frosting (not icing! I used homemade buttercream)
- Yellow food coloring
- Green food coloring
- A spoon
- Oreos (One package)
- A piping bag (I used zipblock sandwich bags)
- Wilton piping tip #352
You are more than welcome to make cupcakes from a box however, for this post, I just this pumpkin cupcake recipe and it made about 28 cupcakes.
- First, bake and cool cupcakes.
- In a small bowl, take out about 1/3 cup of frosting and add in a drop of green food coloring and mix until fully incorprated. Then, in another bowl, take the remaining frosting and color the rest of it bright yellow using the yellow food coloring.
- Set up two piping bags (or zipblock bags with a corner snipped off) and place the #352 Wilton piping tip in the open corner and fill it with yellow icing (filled only halfway so the bag does not over flow!!). If you don’t have couplers or a piping tip, this YouTube video shows you how you can pipe leaves without them! I just prefer to use my piping tips because I have them, and they make the process a bit easier.
- Spread a layer of green icing ontop of each cupcake to make the green “grass”.
- Once you are done spreading the green frosting on all of the cupcakes, place one Oreo cookie ontop of each cupcake for the “sunflower seeds”
- Grab your prepared green frosting bag and hold your piping bag at a 45 degree angle. Aiming towards middle of the Oreo where the Oero filling is, start piping around the Oreo. To do this, you push the frosting out and slowly pull it towards the edge of the cupcake, releasing pressure and lifting up slightly at the end to make it make a point. After that is done, you do the same thing ontop of the first flower pedel layer and continue until you have the desired amount of flower pedal layers on your cupcake.